
Contents
1 Introduction
I try to take advantage of the powerful Django admin in all my web projects, at least in the beginning.
However, as the project evolves and the frontend improves, the usage of the admin tends to be more and more residual.
Adding editing capabilities to the frontend in a modern user interface requires the usage of modal forms, which, to be honest, have always puzzled me for some reason.
django-frontend-form is a package which provides tools for working with modal popups, form submission and validation via ajax in a Django project.
This accompanying Example project presents a collection of techniques and best practices aimed to organize the code in an effective way to minimize repetitions.
2 Basic modals
2.1 HTML popup windows do not exist
There is no such thing as a poup windows in the HTML world.
You have to create the illusion of it stylizing a fragment of the main HTML page, and hiding and showing it as required.
Isn't this cheating ?
2.2 A basic modal box with pure Javascript
w3schools.com supplies an example; here is the code:
https://www.w3schools.com/howto/tryit.asp?filename=tryhow_css_modal2
Isn't this too much fuss for such a simple task ?

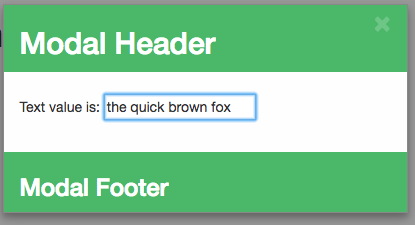
w3school modal example
Well, actually it's not that bad.
Here is how it works:
- a semi-transparent and initially hidden "modal" element covers the whole html page, thus providing a backdrop
- a nested "modal content" element has been given the style to look as a popup window
- you can show or hide the modal by playing with it's display CSS attribute
<script language="javascript">

    $(document).ready(function() {

        // Get the modal
        var modal = $('#my-modal');

        // Open the modal
        var button = $('#button-open-modal');
        button.on('click', function(event) {
            modal.css('display', 'block');
        })

        // Close the modal
        var close_button = $('.close');
        close_button.on('click', function(event) {
            modal.css('display', 'none');
        })

        // When the user clicks anywhere outside of the modal, close it
        $(window).on('click', function(event) {
            if (event.target.id == modal.attr('id')) {
                modal.css('display', 'none');
            }
        });

    });

</script>
Note
Code sample: A basic modal box with jQuery
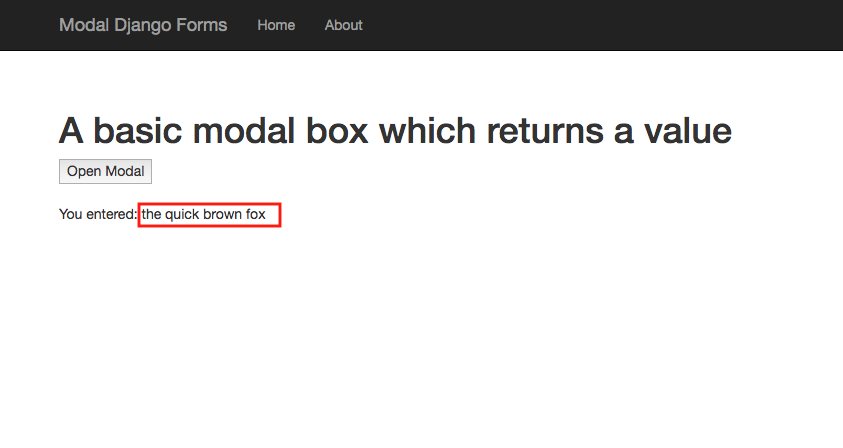
2.3 A modal which returns a value
How can we collect a value from the user in the modal window, and return it to the main page?
We have access to any javascript functions available (after all, we're living in the same HTML page), so we can call any helper just before closing the modal.
function close_popup(modal) {
    var value = modal.find('.my-modal-body input').val();
    save_text_value(value);
    modal.hide();
}

function save_text_value(value) {
    if (value) {
        $('#result-wrapper').show();
        $('#result').text(value);
    }
    else {
        $('#result-wrapper').hide();
    }
}
Note
Code sample: A basic modal box which returns a value
Always remember to clean the input box every time before showing the modal box, as this will be reused again and again ...
function open_popup(modal) {
    var input = modal.find('.my-modal-body input');
    input.val('');
    modal.show();
    input.focus();
}
2.4 Bootstrap modal plugin
Bootstrap provides a specific (somehow limited) plugin to handle modals:
https://getbootstrap.com/docs/4.0/components/modal/
You can ask for a larger or smaller dialog specifing either 'modal-lg' or 'modal-sm' class.
The pluging fires some specific events during the modal life cycle:
https://getbootstrap.com/docs/4.0/components/modal/#events
Note
Code sample: A basic modal box with Bootstrap
3 Basic modals in a Django template
3.1 Objectives
Moving our attention to a dynamic site based on Django, our main objectives become:
- having a dialog box, to be used as "container" for user interaction, whose layout is coherent with the front-end pages
- the content and life cycle of the dialog can be controlled "server-side"
- the dialog will close when the user has completed or cancelled the operation
3.2 Usage
The solution provided by django-frontend-forms requires two actions:
- to provide an HTML template for the dialog layout
- attach the template to a Dialog() javascript object to control it's behaviour
Since in most cases you will be primarily interested in customizing the modal content only, a default template is provided to render a generic dialog (file frontend_forms/templates/frontend_forms/dialogs.html):
<div id="dialog_generic" class="dialog draggable"> <div class="dialog-dialog"> <div class="dialog-content"> <div class="dialog-header"> <span class="spinner"> <i class="fa fa-spinner fa-spin"></i> </span> <span class="close">×</span> <div class="title">Title</div> </div> <div class="dialog-body ui-front"> {% comment %} <p>Some text in the dialog ...</p> {% endcomment %} </div> <div class="dialog-footer"> <input type="submit" value="Close" class="btn btn-close" /> <input type="submit" value="Save" class="btn btn-save" /> <div class="text">footer</div> </div> </div> </div> </div>
When instantiating the javascript Dialog object, you can select an alternative template instead, providing a suitable value for djalog_selector:
$(document).ready(function() {

    dialog1 = new Dialog({
        dialog_selector: '#dialog_generic',
        html: '<h1>Loading ...</h1>',
        width: '400px',
        min_height: '200px',
        title: '<i class="fa fa-calculator"></i> Select an object ...',
        footer_text: 'testing dialog ...'
    });

});
It is advisable to use an HTML structure similar to the default layout;
Notes:
- adding ".ui-front" to the ".dialog-box" element helps improving the behaviour of the dialog on a mobile client
- adding class ".draggable" makes the Dialog draggable - this is optional, and requires jquery-ui
3.3 Opening a static Dialog
The layout of the Dialog is fully described by the referenced HTML template: either the default "#dialog_generic" of a specific one.
You can fully customize the rendering with CSS; the default styles are provided by static/frontend_forms/css/frontend_forms.css
dialog1 = new Dialog({
    dialog_selector: '#dialog_generic',
    html: '<h1>Static content goes here ...</h1>',
    width: '600px',
    min_height: '200px',
    title: '<i class="fa fa-calculator"></i> Select an object ...',
    footer_text: 'testing dialog ...',
    enable_trace: true
});

dialog1.open()
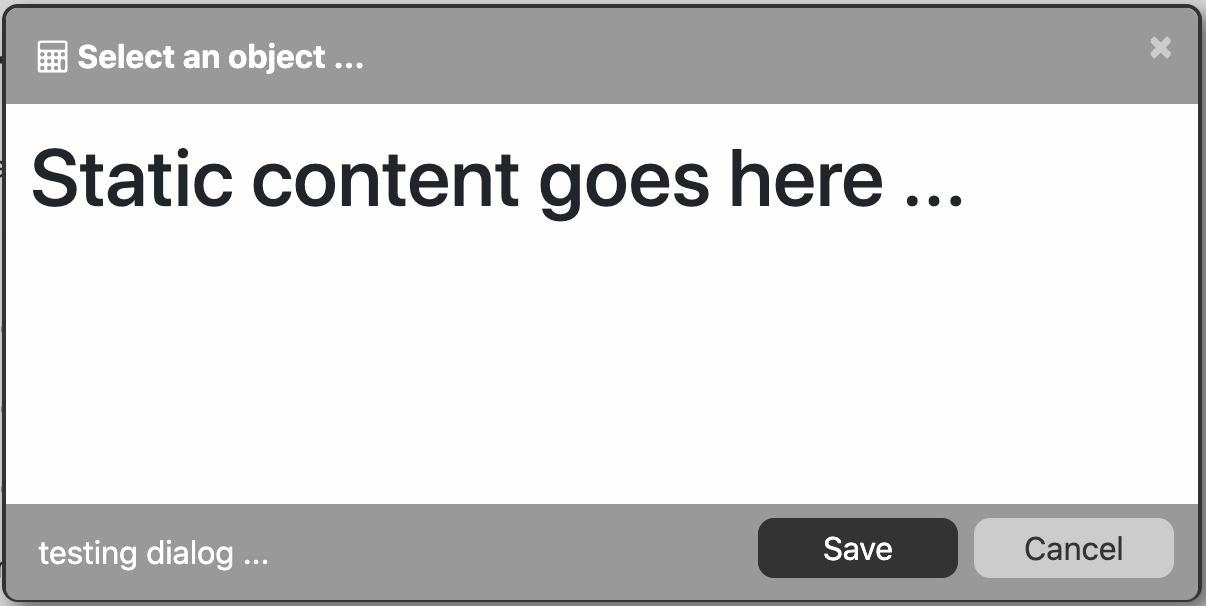
A simple static Dialog
3.4 Opening a dynamic Dialog
In most cases, you will rather produce the dialog content dynamically.
To obtain that, just add an "url" option to the Djalog constructor, and it will be automatically used to obtain the Dialog content from the server via an Ajax call.
dialog1 = new Dialog({
    ...
    url: "{% url 'samples:simple-content' %}",
    ...
Sometimes it is convenient to reuse the very same single view to render either a modal dialog, or a standalone HTML page.
This can be easily accomplished providing:
- an "inner" template which renders the content
- an "outer" container template which renders the full page, then includes the "inner" template
- in the view, detect the call context and render one or another
def simple_content2(request):

    # Either render only the modal content, or a full standalone page
    if request.is_ajax():
        template_name = 'frontend/includes/simple_content2_inner.html'
    else:
        template_name = 'frontend/includes/simple_content2.html'

    return render(request, template_name, {
    })
here, the "inner" template provides the content:
<div class="row">
    <div class="col-sm-4">
        {% lorem 1 p random %}
    </div>
    <div class="col-sm-4">
        {% lorem 1 p random %}
    </div>
    <div class="col-sm-4">
        {% lorem 1 p random %}
    </div>
</div>
while the "outer" one renders the full page:
{% extends "base.html" %}
{% load static staticfiles i18n %}

{% block content %}
{% include 'frontend/includes/simple_content2_inner.html' %}
{% endblock content %}
More examples are available here:
Note
Code sample: Simple Dialogs with Django
3.5 Files organization
You should include the default styles and the javascript support in your base template.
For convenience, a sample HTML template has been provided for a generic dialog, and should be included as well.
<link rel="stylesheet" href="{% static 'frontend_forms/css/frontend_forms.css' %}">
<script src="{% static 'frontend_forms/js/frontend_forms.jsx' %}"></script>

{% block modals %}
    {% include 'frontend_forms/dialogs.html' %}
{% endblock modals %}
Since the js code uses the class keyword, you might want to transpile frontend_forms.jsx with Babel for maximum compatibility, to support oldest browsers.
4 Form submission from a modal
We've successfully injected data retrieved from the server in our modals, but did not really interact with the user yet.
When the modal body contains a form, things start to become interesting and tricky.
4.1 Handling form submission
When a form submission is involved, the modal life cycle has to be modified as follows:
First and foremost, we need to prevent the form from performing its default submit.
If not, after submission we'll be redirected to the form action, outside the context of the dialog.
We'll do this binding to the form's submit event, where we'll serialize the form's content and sent it to the view for validation via an Ajax call.
Then, upon a successufull response from the server, we'll need to further investigate the HTML received:
- if it contains any field error, the form did not validate successfully, so we update the modal body with the new form and its errors
- otherwise, user interaction is completed, and we can finally close the modal
django-frontend-forms, upon detecting a form in the content downloaded from the server, already takes care of all these needs automatically, and keeps refreshing the modal after each submission until the form validation succeedes.
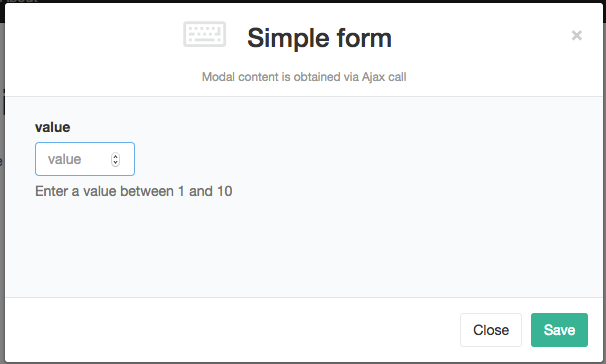
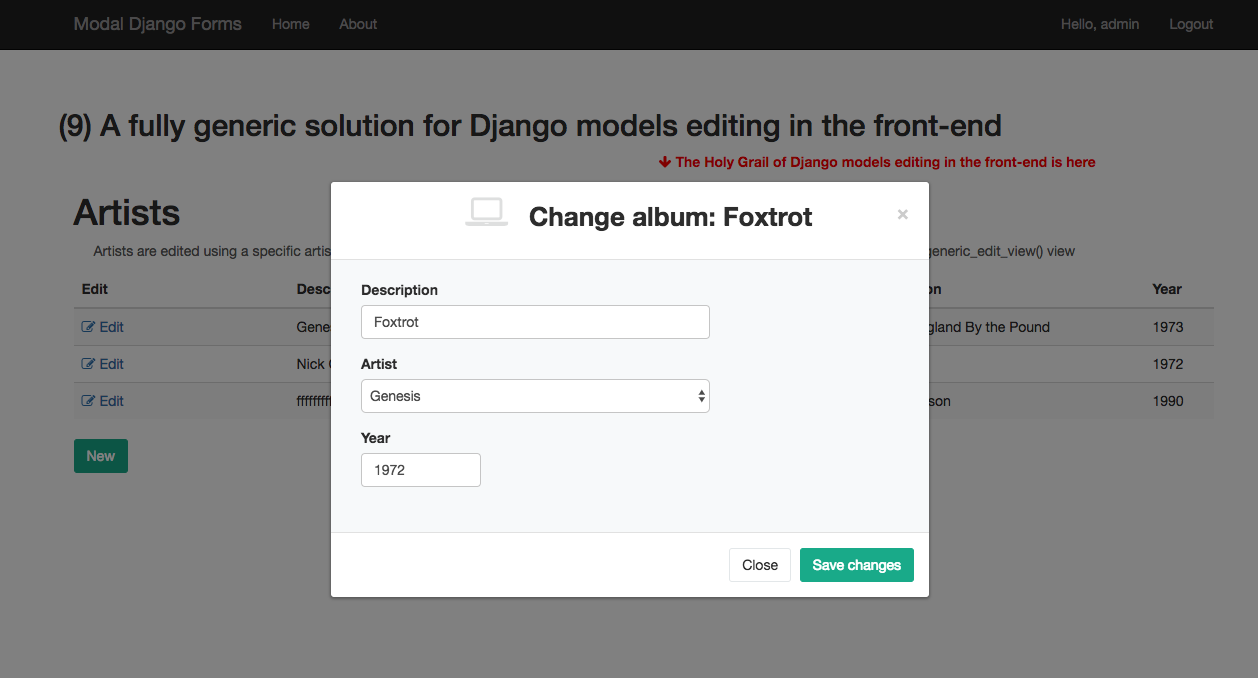
A form in the modal dialog
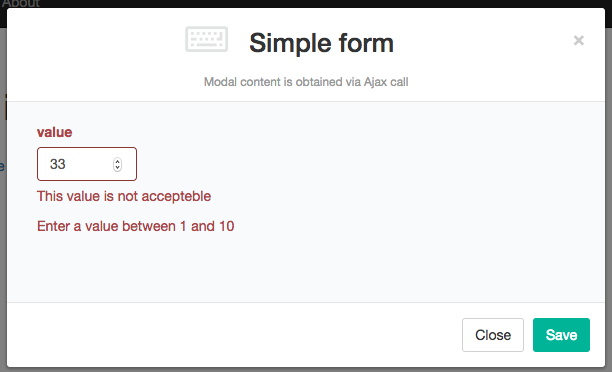
While the form does not validate, we keep the dialog open
4.2 Implementation
If you're curious, here below is a detailed explanation of how all this is achieved.
Form detection happens at the end of modal opening:
open(event=null, show=true) {

    ...

    // Load remote content
    if (self.options.url) {
        self._load().done(function(data, textStatus, jqXHR) {
            var form = self.element.find('.dialog-content .dialog-body form');
            if (form.length == 1) {
                // Manage form
                self._form_ajax_submit();
            }
        });
    }
}
In case, the code triggers a call to the helper method _form_ajax_submit(), which is the real workhorse.
I developed it adapting the inspiring ideas presented in this brilliant article:
Use Django's Class-Based Views with Bootstrap Modals
Here's the full code:
_form_ajax_submit() {
    var self = this;

    var content = self.element.find('.dialog-content');
    var header = content.find('.dialog-header');
    var body = content.find('.dialog-body');
    var footer = content.find('.dialog-footer');
    var form = content.find('.dialog-body form');

    // use footer save button, if available
    var btn_save = footer.find('.btn-save');
    if (btn_save) {
        form.find('.form-submit-row').hide();
        btn_save.off().on('click', function(event) {
            form.submit();
        });
    }

    // Give focus to first visible form field
    if (self.options.autofocus_first_visible_input) {
        form.find('input:visible').first().focus().select();
    }

    // bind to the form’s submit event
    form.on('submit', function(event) {

        // prevent the form from performing its default submit action
        event.preventDefault();
        header.addClass('loading');

        // serialize the form’s content and send via an AJAX call
        // using the form’s defined method and action
        var url = form.attr('action') || self.options.url;
        var method = form.attr('method') || 'post';
        var data = form.serialize();

        self._notify('submitting', {method: method, url: url, data:data});
        $.ajax({
            type: method,
            url: url,
            data: data,
            cache: false,
            crossDomain: true,
            headers: {
                // make sure request.is_ajax() return True on the server
                'X-Requested-With': 'XMLHttpRequest'
            }
        }).done(function(xhr, textStatus, jqXHR) {

            // update the modal body with the new form
            body.html(xhr);

            // If the server sends back a successful response,
            // we need to further check the HTML received

            // If xhr contains any field errors,
            // the form did not validate successfully,
            // so we keep it open for further editing
            //if ($(xhr).find('.has-error').length > 0) {
            if ($(xhr).find('.has-error').length > 0 || $(xhr).find('.errorlist').length > 0) {
                self._notify('loaded', {url: url});
                self._form_ajax_submit();
            } else {
                // otherwise, we've done and can close the modal
                self._notify('submitted', {method: method, url: url, data: data});
                self.close();
            }

        }).fail(function(jqXHR, textStatus, errorThrown) {
            console.log('ERROR: errorThrown=%o, textStatus=%o, jqXHR=%o', errorThrown, textStatus, jqXHR);
            FrontendForms.display_server_error(errorThrown);
        }).always(function() {
            header.removeClass('loading');
        });
    });
}
We start by taking care of the submit button embedded in the form. While it's useful and necessary for the rendering of a standalone page, it's rather disturbing in the modal dialog:
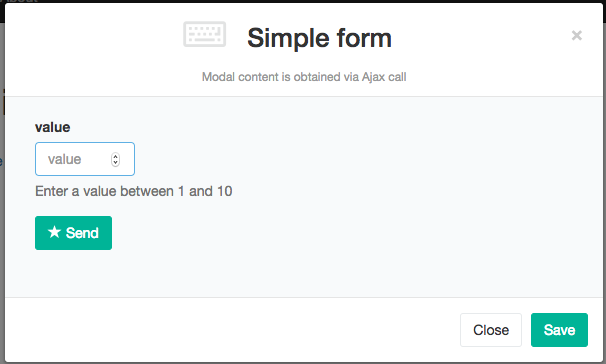
Can we hide the "Send" button and use the "Save" button from the footer instead ?
Here's the relevant code:
// use footer save button, if available
var btn_save = footer.find('.btn-save');
if (btn_save) {
    form.find('.form-submit-row').hide();
    btn_save.off().on('click', function(event) {
        form.submit();
    });
}
Then, we proceed by hijacking the form submission:
// bind to the form’s submit event
form.on('submit', function(event) {

    // prevent the form from performing its default submit action
    event.preventDefault();

    ...

    var data = form.serialize();
    $.ajax({..., data: data, ...
Finally, we need to detect any form errors after submission, and either repeat the whole process or close the dialog:
}).done(function(xhr, textStatus, jqXHR) {

    // update the modal body with the new form
    body.html(xhr);

    if ($(xhr).find('.has-error').length > 0 || $(xhr).find('.errorlist').length > 0) {
        self._form_ajax_submit();
    } else {
        self.close();
    }
One last detail: during content loading, we add a "loading" class to the dialog header, to make a spinner icon visible until we're ready to either update or close the modal.
4.3 Giving a feedback after successful form submission
Sometimes, you might want to notify the user after successful form submission.
To obtain this, all you have to do, after the form has been validated and saved, is to return an HTML fragment with no forms in it; in this case:
- the popup will not close
- the "save" button will be hidden
thus giving to the user a chance to read your feedback.
Note
Code sample: Dialogs with Form validation
In these samples, a sleep of 1 sec has been included in the view to simulate network latency or a more complex elaboration which might occur in real situations
5 Creating or updating a Django Model in the front-end
We can now apply what we've built so far to edit a specific Django model from the front-end.
5.1 Creating a new model
This is the view:
from frontend_forms.decorators import check_logged_in
from django.core.exceptions import PermissionDenied
from django.http import HttpResponseRedirect
from .forms import ArtistCreateForm


@check_logged_in()
def add_artist(request):

    if not request.user.has_perm('backend.add_artist'):
        raise PermissionDenied

    # Either render only the modal content, or a full standalone page
    if request.is_ajax():
        template_name = 'frontend_forms/generic_form_inner.html'
    else:
        template_name = 'dialogs/generic_form.html'

    object = None
    if request.method == 'POST':

        form = ArtistCreateForm(data=request.POST)
        if form.is_valid():
            object = form.save()
            if not request.is_ajax():
                # reload the page
                message = 'The object "%s" was added successfully.' % object
                messages.success(request, message)
                next = request.META['PATH_INFO']
                return HttpResponseRedirect(next)
            # if is_ajax(), we just return the validated form, so the modal will close
    else:
        form = ArtistCreateForm()

    return render(request, template_name, {
        'form': form,
        'object': object,
    })
Note that we're using a generic template from the library called frontend_forms/generic_form_inner.html:
{% load i18n frontend_forms_tags %}

<div class="row">
    <div class="col-sm-12">
        <form action="{{ action }}" method="post" class="form {{form.form_class}}" novalidate autocomplete="off">
            {% csrf_token %}
            {% render_form form %}
            <input type="hidden" name="object_id" value="{{ object.id|default:'' }}">
            <div class="form-submit-row">
                <input type="submit" value="Save" />
            </div>
        </form>
    </div>
</div>
Chances are we'll reuse it unmodified for other Models as well.
You can of course supply your own template when form rendering needs further customizations.
The form is minimal:
from django import forms

class ArtistCreateForm(forms.ModelForm):

    class Meta:
        model = Artist
        fields = [
            'name',
            'notes',
        ]
On successful creation, we might want to update the user interface;
in the example, for simplicity, we just reload the entire page, but before doing that we also retrieve the id of the newly created object, to enhance it after page refresh;
this could be conveniently used, instead, for in-place page updating.
<script language="javascript">

    dialog_artist_add = new Dialog({
        url: "{% url 'samples:artist-add-basic' %}",
        dialog_selector: '#dialog_generic',
        html: '<h1>Loading ...</h1>',
        width: '600px',
        min_height: '200px',
        title: '<i class="fa fa-calculator"></i> Create an Artist ...',
        button_save_label: "Save",
        button_save_initially_hidden: true,
        enable_trace: true,
        callback: function(event_name, dialog, params) {
            switch (event_name) {
                case "submitting":
                    FrontendForms.overlay_show('.dialog-body');
                    break;
                case "loaded":
                    FrontendForms.overlay_hide('.dialog-body');
                    break;
                case "submitted":
                    var object_id = dialog.element.find('input[name=object_id]').val();
                    // Reload page, with last selection enhanced
                    var url = new URL(document.location.href);
                    url.searchParams.set('selected_artist', object_id);
                    FrontendForms.gotourl(url, show_layer=true);
                    break;
            }
        }
    });

</script>
5.2 Updating an existing object
We treat the update of an existing object in a similar fashion, but binding the form to the specific database record.
Urls:
path('artist/add-basic/', views.add_artist, name="artist-add-basic"),
path('artist/<uuid:pk>/change-basic/', views.update_artist, name="artist-change-basic"),
The view:
from frontend_forms.decorators import check_logged_in
from django.views.decorators.cache import never_cache
from django.core.exceptions import PermissionDenied
from django.http import HttpResponseRedirect
from frontend_forms.utils import get_object_by_uuid_or_404
from .forms import ArtistUpdateForm


@check_logged_in()
def update_artist(request, pk):

    if not request.user.has_perm('backend.change_artist'):
        raise PermissionDenied

    # Either render only the modal content, or a full standalone page
    if request.is_ajax():
        template_name = 'frontend_forms/generic_form_inner.html'
    else:
        template_name = 'dialogs/generic_form.html'

    object = get_object_by_uuid_or_404(Artist, pk)
    if request.method == 'POST':

        form = ArtistUpdateForm(instance=object, data=request.POST)
        if form.is_valid():
            object = form.save()
            if not request.is_ajax():
                # reload the page
                next = request.META['PATH_INFO']
                return HttpResponseRedirect(next)
            # if is_ajax(), we just return the validated form, so the modal will close
    else:
        form = ArtistUpdateForm(instance=object)

    return render(request, template_name, {
        'form': form,
        'object': object,
    })
and the form:
class ArtistUpdateForm(forms.ModelForm):

    class Meta:
        model = Artist
        fields = [
            'description',
            'notes',
        ]
The Dialog is much similar to the previous one; we just re-initialize it's url with the required object id before opening it:
<a href="{% url 'samples:artist-change-basic' artist.id %}" class="btn btn-primary" onclick="open_artist_change_dialog(event); return false;">Edit</a>

...

<script language="javascript">

    function open_artist_change_dialog(event) {
        event.preventDefault();
        var url = $(event.target).attr('href');
        dialog_artist_change.options.url = url;
        dialog_artist_change.open(event);
    }

</script>
5.3 Possible optimizations
In the code above, we can recognize at list three redundancies:
- the two model forms are identical
- the two views are similar
- and, last but not least, we might try to generalize the views for reuse with any Django model
We'll investigate all these opportunities later on;
nonetheless, it's nice to have a simple snippet available for copy and paste to be used as a starting point anytime a specific customization is in order.
Note
Code sample: Editing a Django Model
6 Creating or updating a Django Model (revised)
Let's start our optimizations by removing some redundancies.
Sharing a single view for both creating a new specific Model or updating an existing one is now straightforward; see edit_artist() belows:
from django.core.exceptions import PermissionDenied
from django.http import HttpResponseRedirect
from frontend_forms.utils import get_object_by_uuid_or_404
from frontend_forms.decorators import check_logged_in
from .forms import ArtistUpdateForm


@check_logged_in()
def edit_artist(request, pk=None):
    """
    Either add a new Artist,
    or change an existing one
    """

    # Retrieve object
    if pk is None:
        # "Add" mode
        object = None
        required_permission = 'backend.add_artist'
    else:
        # "Change" mode
        object = get_object_by_uuid_or_404(Artist, pk)
        required_permission = 'backend.change_artist'

    # Check user permissions
    if not request.user.is_authenticated or not request.user.has_perm(required_permission):
        raise PermissionDenied


    # Either render only the modal content, or a full standalone page
    if request.is_ajax():
        template_name = 'frontend_forms/generic_form_inner.html'
    else:
        template_name = 'dialogs/generic_form.html'

    if request.method == 'POST':

        form = ArtistUpdateForm(instance=object, data=request.POST)
        if form.is_valid():
            object = form.save()
            if not request.is_ajax():
                # reload the page
                if pk is None:
                    message = 'The object "%s" was added successfully.' % object
                else:
                    message = 'The object "%s" was changed successfully.' % object
                messages.success(request, message)
                next = request.META['PATH_INFO']
                return HttpResponseRedirect(next)
            # if is_ajax(), we just return the validated form, so the modal will close
    else:
        form = ArtistUpdateForm(instance=object)

    return render(request, template_name, {
        'form': form,
        'object': object,
    })
When "pk" is None, we act in add mode, otherwise we retrieve the corresponding object to change it.
Both "add" and "change" URL patterns point to the same view, but the first one doesn’t capture anything from the URL and the default value of None will be used for pk.
urlpatterns = [
    ...
    path('artist/add/', views.edit_artist, name="artist-add"),
    path('artist/<uuid:pk>/change/', views.edit_artist, name="artist-change"),
    ...
]
We also share a common form:
class ArtistEditForm(forms.ModelForm):
    """
    To be used for both creation and update
    """

    class Meta:
        model = Artist
        fields = [
            'description',
            'notes',
        ]
The javascript Dialog can be refactored in a completely generic way, with no reference to the specific Model in use: infact, it's just a plain dialog which submits an arbitrary form.
You only need to provide the necessary url (and probably a suitable title) before opening the dialog:
<a href="{% url 'samples:artist-add' %}" class="btn btn-primary" onclick="open_artist_edit_dialog(event, 'Create an Artist ...'); return false;">Add</a>
...
{% for artist in artists %}
    ...
    <a href="{% url 'samples:artist-change' artist.id %}" class="btn btn-primary" onclick="open_artist_edit_dialog(event); return false;">Edit</a>
{% endfor %}


<script language="javascript">

    function open_artist_edit_dialog(event, title) {
        event.preventDefault();
        var url = $(event.target).attr('href');
        dialog_edit.options.url = url;
        dialog_edit.options.title = title;
        dialog_edit.open(event);
    }

    $(document).ready(function() {

        dialog_edit = new Dialog({
            //url: none,
            dialog_selector: '#dialog_generic',
            html: '<h1>Loading ...</h1>',
            width: '600px',
            min_height: '200px',
            //title: none,
            button_save_label: "Save",
            button_save_initially_hidden: true,
            enable_trace: true,
            callback: function(event_name, dialog, params) {
                switch (event_name) {
                    case "submitting":
                        FrontendForms.overlay_show('.dialog-body');
                        break;
                    case "loaded":
                        FrontendForms.overlay_hide('.dialog-body');
                        break;
                    case "submitted":
                        var object_id = dialog.element.find('input[name=object_id]').val();
                        // Reload page, with last selection enhanced
                        var url = new URL(document.location.href);
                        url.searchParams.set('selected_record', object_id);
                        FrontendForms.gotourl(url, show_layer=true);
                        break;
                }
            }
        });

    });

</script>
6.1 Deleting a Model
Object deletion can be achieved preparing a view like this:
def delete_artist(request, pk):

    required_permission = 'backend.delete_artist'
    if not request.user.is_authenticated or not request.user.has_perm(required_permission):
        raise PermissionDenied

    object = get_object_by_uuid_or_404(Artist, pk)
    object_id = object.id
    object.delete()

    return JsonResponse({'object_id': object_id})
then invoking it via Ajax after user confirmation:
<a href="{% url 'samples:artist-delete' artist.id %}" class="btn btn-danger" onclick="delete_artist(event, 'Deleting {{artist.name}}'); return false;">Delete</a>

<script>
    function delete_artist(event, title) {
        event.preventDefault();
        var url = $(event.target).attr('href');
        FrontendForms.confirmRemoteAction(
            url,
            {
                title: title,
                text: 'Are you sure?',
                confirmButtonClass: 'btn-danger',
                icon: 'question'
            },
            function(data) {

                var row = $('tr#artist-'+data.object_id);
                row.remove();

                Swal.fire({
                    text: 'Artist "' + data.object_id + '" has been deleted',
                    icon: 'warning'
                })
            },
            data=true   // set to any value to obtain POST
        );
    }
</script>
In the above snippet, we use the received object id to remove the corresponding table row after deletion.
Note
Code sample: Editing a Django Model (Revised)
7 Advanced forms
7.1 Using advanced field widgets
Nothing prevents you from using advanced widgets in the form; the only provision is to rebind all required javascript handlers to the input items after each form submission; for that, use the loaded event.